
Ready for the tastiest, most tender, most finger-licking ribs you’ve ever tasted? You’d better be, because this Dr. Pepper Ribs recipe gives new meaning to the term “sinful.”
But despite the devilishly delicious taste, these ribs are actually pretty low on fat and calories. If you try one new recipe this barbeque season, this should be it!

The original recipe made only half as much sauce but it is just too good to make in such small quantities. I generally use about ¾ of the doubled recipe for my ribs and then save the rest for dipping or for another meal the next day.
Because I’m a mom and I’m busy, I streamline the process as much as possible. First, I marinate the ribs in two Ziploc freezer bags rather than dirtying up a baking dish.
And instead of brushing each section of ribs with sauce, I just put them in a large pot once they’ve finished baking in the oven, pour half the sauce over them and shake the pot gently with the lid on to coat the ribs in sauce.

The end result is absolutely fabulous; tender, meaty, melt-in-your-mouth goodness. My sister is the one that first turned me on to this Dr. Pepper Ribs recipe and so far everyone I’ve met that has tried it has loved it. Cook them up with Japanese Coleslaw Asian Salad or an old-fashioned Potato Salad on the side and welcome summer with the tastiest ribs imaginable!
Barbequed Dr. Pepper Ribs
Tender and flavourful ribs in a homemade Dr. Pepper barbeque sauce!
Ingredients
- 2 racks baby back ribs
- 1 2 L bottle of Dr Pepper
- 1/4 cup salt
- 1 Tbsp chili powder
- 1 Tbsp canola oil or vegetable oil
- 1 onion, minced
- 2 cloves garlic, minced
- 1 cup ketchup
- 2 Tbsp soy sauce
- 2 Tbsp balsamic vinegar
- 1/4 tsp cayenne pepper, optional
Instructions
- Cut the ribs into sections containing two or three ribs each. Place the ribs in a baking dish or Ziploc freezer bag. Pour in Dr Pepper to cover them, reserving at least 1 cup for the sauce. Add the salt and soak the ribs in the fridge overnight (or at least 2 hours).
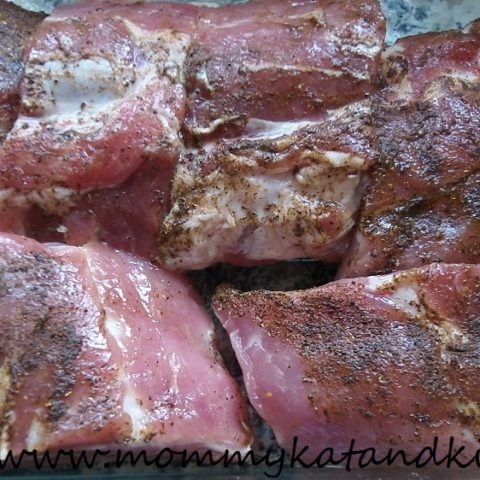
- Heat the oven to 350°F. Drain and dry the ribs and then rub them with the chili powder. Place them in a single layer in a large baking dish, add a cup of water and cover the dish tightly with foil. Bake for 2 hours, until the meat nearly falls off the bone.
- For the barbecue sauce, heat the oil in a saucepan over medium heat. Saute the onion and garlic until they're soft and fragrant, then add the ketchup, soy sauce, vinegar, cayenne and one cup of Dr Pepper. Simmer for 15 to 20 minutes, or until the sauce thickens.
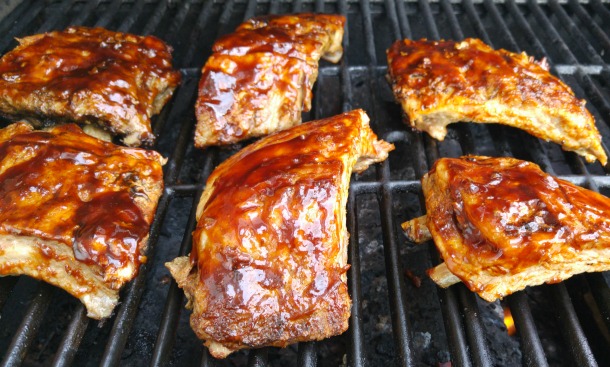
- Preheat the barbeque and brush the ribs with sauce. When the grill is hot, cook the ribs bone-side down on a cooler part for 10 to 15 minutes. Flip them and cook until lightly charred. Remove, brush on more sauce and serve.
Notes
Adapted from Men's Health Dr. Pepper Ribs
Nutrition Information:
Yield: 4 Serving Size: 4 peopleAmount Per Serving: Calories: 465Total Fat: 32gSaturated Fat: 8gTrans Fat: 0gUnsaturated Fat: 17gCholesterol: 132mgSodium: 6568mgCarbohydrates: 86gFiber: 2gSugar: 18gProtein: 38g
I’m going to be trying this recipe really soon! Looks so delicious !
These have the most unique and delicious flavour!
Kathryn, do you think this recipe would work with beef short ribs, too?
Absolutely it would, Dee! The main thing to remember with ribs is that beef ribs should pretty much always be precooked and pork ribs the choice is up to you. This recipe uses that oven-baking with the cup of water added to precook the meat and ensure that you’ll get that tender, melt-in-your-mouth texture that you want, so just make sure that the meat of the ribs are almost falling off the bone after baking.
When I’m pressed for time, I’ve even skipped the oven baking and just boiled the ribs on low in a pot of water for about an hour to make them nice and tender instead. :)
Great! Thank you so much, Kathryn. I have to try these!
You’re very welcome, Dee! You’ll have to let me know how you like them! :)
Sounds and looks great!
I seriously cannot recommend it enough, Amy. My sister ruined me on other ribs forever when she introduced me to these! lol
I’m totally trying this recipe! pinning for later!
Oh you’ve totally got to, Jen! With a house full of boys, this recipe is PERFECT for you! ;)