• Home
  • Media Kit
  • About
  • Privacy Policy
  • Terms Of Use
  • Contact
  • enCompass Media

Mommy Kat and Kids

Canadian Mom Blogger - Product Reviews, Travel, Food and Parenting

  • Articles
    • Family
    • Humour
    • Crafts
    • Money
    • Parenting
    • Relationships
    • Self-Esteem
    • Health
  • Blogging
    • Events
    • Opportunities
    • Wednesday WordPress
  • Reviews & Giveaways
    • Giveaway
    • Reviews
    • Giveaways Ending Soon
    • Coupon Code
    • Winners
  • Features
    • Anna’s Budget Tips
    • Wordless Wednesday
    • Friday Giveaway Linky
    • Sunday Quotes
  • Travel
    • Canada
    • USA
    • International
    • Events
  • Recipes
    • Lunch and Snacks
    • Main Dishes
    • Side Dishes
    • Desserts and Treats
    • Beverages
    • Pickles and Preserves
  • The $5000 Wedding
  • Holiday Gift Guide 2020

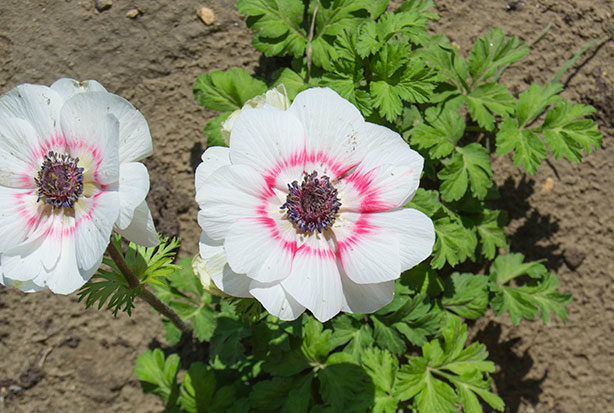
Best Flowers to Plant in a Cutting Garden

August 7, 2018 by Kathryn 27 Comments

mommy kat and kids rp2

I love gardening, but until I moved onto our current property, I only ever planted practical plants like berries and vegetables. As much as I love the fresh produce, I decided that this year I wanted some long lasting cut flowers as well.

long-lasting-cut-flowers-bouquet

And since we often buy bouquets for the dining room table, I thought I’d save money and beautify our house and yard by planning a cutting garden! The term is given to a garden that’s planted mainly so the flowers can be cut and arranged into bouquets.

If you want to plant your own cutting garden, these are some of the best long lasting cut flowers for bouquets. Choose flowers in a variety of colours and decide if you’d prefer complimentary hues or a more varied mix of different shades for your garden.

cutting-garden-anemones [Read more…]

Filed Under: Articles, Gardening Tagged With: cut flowers, cutting garden, flower garden, flowers, garden, gardening, planting a cutting garden

Steps and Ideas for Your DIY Deck Build

May 19, 2018 by Kathryn 2 Comments

mommy kat and kids rp2

Spring has finally arrived in Saskatchewan and I couldn’t be happier! But with a brand-new house on six acres of ungroomed prairie, I also couldn’t be busier! My husband and I have a list of the different jobs we want to complete this spring and summer, and we’ve already started tackling it.

deck-and-baby
Baby Cormac watching his new deck come together!

One of our biggest priorities was adding a back deck to our house. We were both a little nervous about it since neither of us had ever built a deck before. But with a lot of research and some help from family, we were able to complete our dream deck in just three days!

Planning a deck build of your own? Here’s the step-by-step process that helped take our deck from dream to reality:

Try Deck Designing Software

There are a few handy deck designing tools available online, and I had fun testing them out to create my perfect deck. Of course, every free tool wants to sell you something, so you may need to create a free account or register for a mailing list to get access. But it can be worth it to create a detailed, professional version of your dream deck.

deck-plans

Personally, I used the deck designing software from Decks.com to create my blueprint. It allowed me to download a blueprint and a complete list of materials, all with just a few minutes of time online! I decided on a large deck with angled corners and two sets of stairs.

Check with Your Building Inspector

While deck designing software is great, the blueprints are generally set to the highest possible building code standards. While that certainly means a deck will be built well, it can also mean it costs more than it needs to. When we checked in with our building inspector, we learned that instead of using the ten foundation posts that were on our blueprints, we could instead use only five and still have a solid deck.

deck-blocking
By putting these blocks in between our joists, we were able to eliminate five of our foundation piles!

Our inspector also gave us some tips on making sure that the length of our deck was properly supported, as well as some online resources that would help ensure we had all the information we needed to build a strong and long-lasting deck. The building permit cost $125 but being able to eliminate five foundation piles saved us $1000!

Consider Your Foundation

There are many different foundation options for a deck, from simple concrete pads to huge steel posts. The most common method of supporting a deck is usually digging a hole and then filling it with concrete. For our deck, we decided to spend a little more and use screw piles. Because Saskatchewan gets so cold in the winter, the longer metal supports stay below the frost line to prevent the deck from heaving.

deck-helical-pile-foundation
Helical, or screw piles, are long metal posts that are drilled into the ground to provide a solid foundation. In a province with extreme cold, they ensure the deck will stay in place without heaving.

The height of the deck also plays a part in choosing a foundation. A higher deck is especially sturdy when screw piles are used. A low deck may need no more than a concrete pad. And in warmer climates where frost doesn’t sink as deeply into the ground, a concrete post may be ideal. Whatever you choose, consider cost, durability and the work involved before making your choice.

Start the Build

With the foundation in place, the building can begin! A deck consists of layers, and our deck was comprised of sturdy six-by-six posts on top of our screw piles, a 3-ply 2×10 beam on top of the posts and then 2×10 joists on top of the beam. Joists are basically just supports for the deck and the boards that will go on top. And assembling the various layers is easy, but does take lots of measuring, cutting and securing!

deck-layers
The many layers of a deck! Foundation, post, three-ply beam and joists. On top of all this, the deck boards will be nailed into place.

When all the layers are in place, the deck boards can be screwed into the joists. The job is easy, but time consuming. And protecting my hands from splinters was a must! While my husband and father preferred their work gloves, I use my Dig It Long Cuff High 5 Gloves for DIY work like this. They feature unique cushioned fingertips to help protect my nails while I work. And I love how they’re fitted to my hands!

dig-it-gloves-and-deck
Screwing down deck boards with my Dig It gloves! They help protect my hands from splinters and keep my nails in shape thanks to padded fingertips.

Choosing a decking material is another important consideration. While composite deck boards are longer lasting, the low price of pressure treated lumber is a big plus. We chose brown pressure treated lumber for our deck boards. It did splinter a bit here and there when putting in screws, so I just sanded lightly over all the screws to help keep little feet safe.

Railings and Stairs

With our deck built and looking beautiful, we had only two more things to add: the railings and the stairs. Since the deck and our yard are so large, we wanted a set of stairs on either side of the deck. We decided to spend some extra money putting in white metal railings, to save ourselves any maintenance in the future. We’re now waiting for the railing to arrive, and I can’t wait to put it into place!

diy-deck-railing
Metal railing was a splurge, but we wanted to match our front deck and keep our maintenance to a minimum.

We decided to make the stairs five feet wide, using two 2×6 deck boards per stair for a nice, sturdy step. One of the biggest challenges we faced was finding the right height of angled stair stringers for our steps. It took us three tries to get it right! Then it was simply a matter of screwing the boards into place on each metal stair stringer to create our steps, then attaching those steps to the deck.

dig-it-gloves-and-glasses
I love how my gloves and glasses combine fashion and function! The tortoise-shell frames of these safety glasses are divine.

I am so excited to have our back deck completed and can’t wait to get our barbecue and patio set in place as soon as the railings are up. And throughout the building process, my Dig It Long Cuff High 5 Gloves and Eye Dig It Safety Sunglasses ensured that I was building as safely as possible. Whether a screw flew away from me when I was putting in deck boards, or I was lifting a splintered piece of wood, my hands and eyes were protected.

If you’re planning some DIY building this spring, make sure to grab your own pair of Dig It gloves and safety glasses. They’re fashionable, functional and will help you create the backyard oasis of your dreams. Whether you’re building a big back deck like ours or just laying down some paving stones in a favourite nook, Dig It products are the perfect accessory to your project!

Filed Under: Articles, Crafts, Gardening Tagged With: build a deck, build your own deck, building a deck, deck tips, dig it, dig it gardening gloves, dig it gloves, dig it safety glasses, diy deck, gardening, gardening gloves, landscaping, safety sunglasses, sunglasses

Teach Kids About the Earth with Help from EnviroKidz-Giveaway

June 30, 2015 by Kathryn 120 Comments

One of the things I love about my house is the fact that the yard is big enough for a garden. I enjoy growing my own vegetables each year for so many different reasons. The taste is so much better, I don’t have to worry about pesticides and chemicals on produce and I can save money on my weekly grocery bill. What more could any health-conscious mom on a budget ask for?

envirokidz products

But in addition to all those benefits, planting a garden is also a great way to teach children about the importance of plants in our environment. And that’s why I love that EnviroKidz is so passionate about encouraging kids to learn about the earth and the way it sustains us and our animal friends. In fact, the company is doing that in a very fun way this year with a prize pack that will let kids get their hands dirty and grow something tasty! [Read more…]

Filed Under: Reviews, Reviews and Giveaways Tagged With: cereal, cereal bars, eco-friendly, envirokidz, envirokidz cereal, envirokidz charities, environment, garden, gardening, kids, kids cereal, kids cereal bars, kids garden, nature, nature's path, organic

Get Your Kids Gardening with Canadian Tire-Giveaway

June 4, 2014 by Kathryn 226 Comments

Since I’m lucky enough to live in a house with a big backyard, one of my favourite summer activities is gardening. While some women tend to favour flowers, I’ve always preferred practical plants and so gardening for me involves starting and growing fresh vegetables and herbs to feed my family through the sunny summer months. Now that my boys are getting older, I’ve begun to get them involved in the process as well and this year, Canadian Tire sent me a fabulous assortment of gardening supplies to help my boys and I get our vegetables growing!

boy with gardening supplies

I especially loved the sweet little Kids Cup Seed Kits, which featured a peat pot, a starter soil pellet and three seeds from kid-friendly plants such as watermelon and sunflower. The boys had a great time filling the cup with water and watching the soil expand. Then they carefully pushed the seeds into the soil and set the pots in a sunny window to grow. Once the plants have sprouted, we’ll be able to remove the peat pot from the little cup and plant it in the garden! [Read more…]

Filed Under: Gardening, Reviews, Reviews and Giveaways Tagged With: canadian, canadian tire, canadian tire gardening, garden, garden suplies, garden tips, garden with kids, gardening, gardening seeds, gardening supplies, gardening with kids, grow a garden, grow vegetables, kids gardening, tire, vegetable garden, vegetables

Budget Friendly Gardening Tips

May 2, 2013 by Kathryn 5 Comments

The much anticipated arrival of Spring means it’s a great time to get some seeds in the ground and watch them grow into flowers, veggies, berries, herbs and more! Growing your own produce may seem like an ideal way to cut back on food costs, but it doesn’t always turn out that way.

You imagine strolling through rows of lush plants, laden with ripe red tomatoes, plump strawberries and lovely squash…without having to spend a penny! But a costly trip to the garden centre for tools, seeds, plants, soil, pots and compost, followed by a few weeks of weeding only to find that some things never grew and others were devoured by bugs, birds, rabbits or other critters can cause some serious frustration.

garden

So, what to do? How can you increase the chances for a satisfying experience where you reap the rewards (both financial and emotional!) of your garden, and decrease the chances of it becoming a money pit? Get started with these budget friendly gardening tips: [Read more…]

Filed Under: Anna's Budget Tips, Features, Gardening, Guest Post Tagged With: anna platz, budget, budget tip, budget-friendly, friendly, garden, garden tips, gardening, gardening tips, money, save money, tip

  • 1
  • 2
  • Next Page »
  • Facebook
  • Twitter
  • Instagram
  • YouTube
  • Pinterest
  • RSS Feed

Search Mommy Kat and Kids

Current Giveaways

Mommy Kat and Kids
Jeulia Wedding Jewelry 2021

Enter your e-mail address:

Powered by FeedPress

Copyright © 2021 · Lifestyle Pro Theme on Genesis Framework · WordPress · Log in