
One of my favourite things about being a homeowner is updating the look of my home, and with a house that’s over a century old, there is a lot to be updated! Room by room, I have been tackling projects and modernizing the look of my house, and recently Canadian Tire gave me the chance to update one of the rooms that I’ve been longing to tackle for months…my living room.

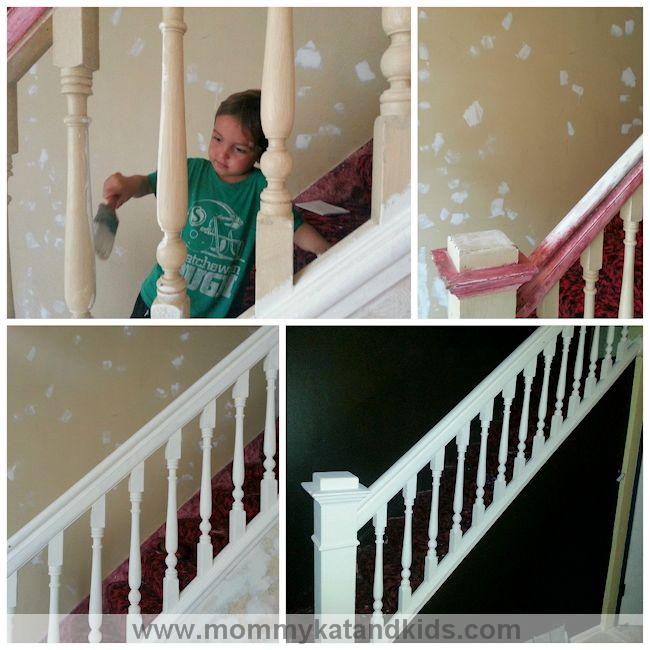
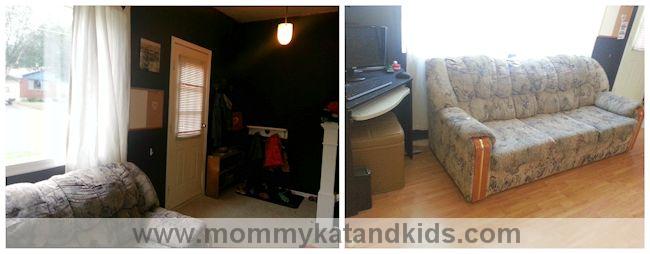
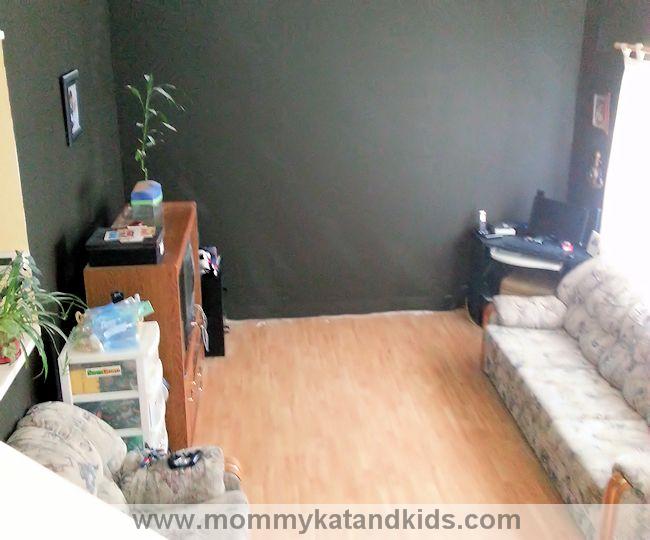
The living room is fairly small, like most rooms in the house. The floor was covered with the same carpet that had been in the house when I was born, making it about 35 years old. Half the walls were drywall but the other half were still lathe and plaster. The room had been painted back when I was a teenager, but the beige shade was outdated and overall look of the room was rather haphazard and old fashioned. I couldn’t wait to tackle the job and turn the room into a comfortable and modern area for spending time with my boys.

Canadian Tire supplied me with a new power drill and an assortment of supplies to upgrade the look of my room and I couldn’t wait to get started. Since I was doing all the work myself, I decided to tackle the room one wall at a time rather than try to do too much at once. It was the right decision, because even repairing the damage to the existing walls was quite a job! But as soon as the first wall was washed, repaired, sanded and painted, I could tell that the work was going to be well worth it. The change in the look of the room was phenomenal!
I absolutely loved the Origins by Benjamin Moore Ultimate Frozen Hot Chocolate shade that I had chosen, especially contrasted with the flat white Alabaster Shell shade. This paint is pricey, but it is worth it for any household with kids. It is high hiding and durable, which is just what I wanted for a room that has children playing in it almost all day long. The colour rolled on nice and smooth and while the dark chocolate brown shade required quite a thick coat of paint initially, two coats provided great coverage. The further I got, the more I fell in love with the colour!

Halfway through my job of repairing and painting the walls, I took a break to rip out the carpet that I’ve despised for so many years and put down sleek laminate flooring instead. I was pleasantly surprised by how easy it was to lay the laminate flooring. I watched a quick step-by-step tutorial and then got started. It took a few tries to get the knack of knocking the pieces into place with a hammer and a block of wood, but I soon had the hang of it and after a long and late night’s work, my beautiful new floor was in place!
Then it was back to the walls and I saved one wall for last knowing it would be the worst. The final wall had retro wood panelling covering it, which had been painted beige along with the rest of the room, and in addition to being very ugly, the wall was also very drafty. Initially I had considered just putting drywall right on top of the panelling but friends and family soon convinced me I should pull down the panelling and see where the draft was coming from. Thankfully, the panelling came down very easily and I could see immediately why the wall had been cold in the winter. Insulated in a time when tar paper acted as vapor barrier, the wall had at some point been infested with mice. The rodents had ripped the tarpaper to shreds and tunneled through the insulation. My next job was reinsulating the wall and putting up a proper plastic vapour barrier, and luckily for me, it was a job that was fairly quick and easy to do. Then it was time to put up my new wall!
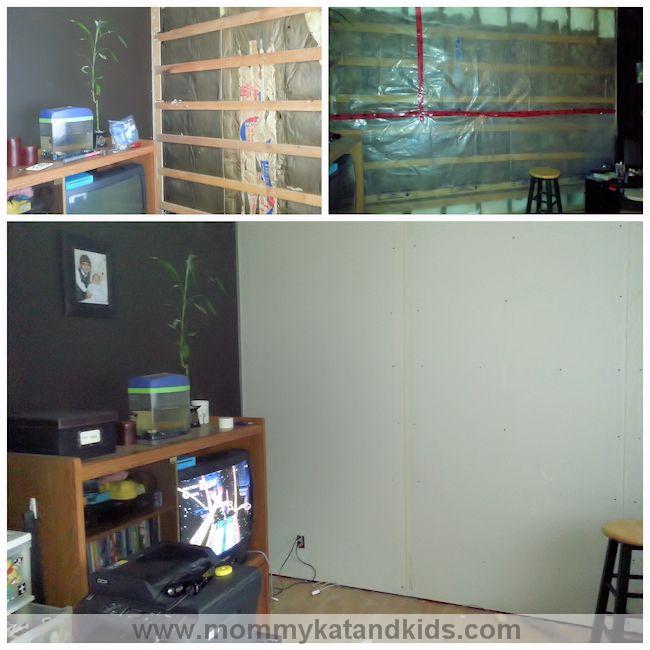
Now up until this point, everything I did to modernize my living room had been something I could handle on my own, and I can safely say that even a beginner in the world of home renovations can likely figure out how to put down laminate, insulate a wall, hang vapour barrier, repair cracks or holes in drywall and paint a room. But putting up drywall is HARD. I managed to get the three nine-foot-high sheets of drywall up and screwed into place. But it involved a lot of heavy lifting, sheer determination and even a little internal cursing. This really is a job that will be much more pleasant with two people, though I managed to get it done myself.
With that I was ready to paint the final wall and put the finishing touches on my job. Even after all four walls and the floor had been finished, there were some minor details to finish, such as baseboard and ceiling trim painting and replacing the old outlets that were no longer working properly. But for all physical appearances, my living room was complete. And it was gorgeous!
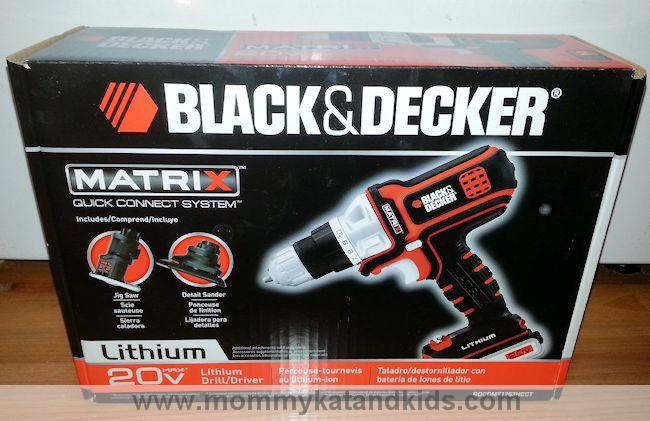
While all the tools and materials that Canadian Tire provided had been helpful, there were two items that really stood out to me as essentials in my renovation process. The first was the Black & Decker Matrix 20V Starter Kit Drill. For somebody that had just minor experience with power tools, my only initial thought had been that I would need a drill for screwing up the drywall when the time came to tackle the final wall. Canadian Tire sent me the Black & Decker Matrix instead, which included a bonus power sanding attachment and jigsaw attachment. I used all three when renovating and I can’t believe how handy they were. The jigsaw attachment cut the holes for the heater vents in my laminate flooring and trimmed up the final pieces of floor to fit properly against the wall. The sanding attachment was perfect for smoothing out the walls after I’d used plaster to repair holes and cracks. And the drill was something I used not just to hang the drywall, but also to remove old screws from some of the other walls as well. If you’re new to power tools, this drill is a great way to add three essentials to your tool collection with one sleek unit.
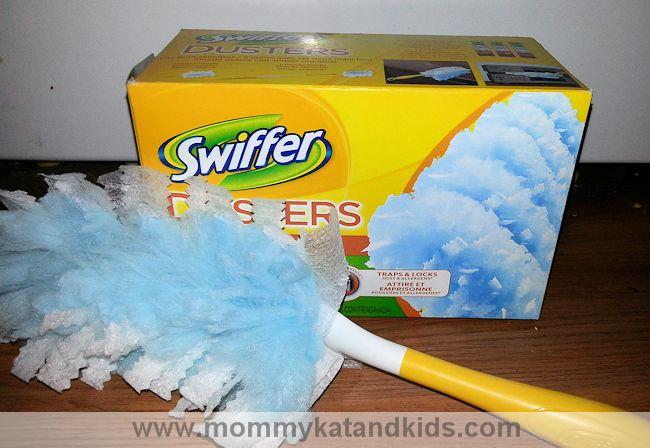
The second must-have during renovating was not something Canadian Tire provided, though it is something the store sells. My Swiffer Duster quickly became the most-used cleaning tool during my renovating process. After plastering and sanding, the walls and the rest of the surfaces in the house were covered with fine dust. Anyone that has ever sanded plaster knows how incredibly messy the job is. So before painting the walls, I used the Swiffer Duster to sweep across the walls and ensure that they were clean and ready for painting. Then I used the duster to clean any dirty surfaces in the room as well. It made the cleaning process so much easier since the dust gets locked away and I didn’t have to bother with wet cleaning methods during the renovation process.

But what really made this experience so wonderful was the help and expertise of the fabulous team at Canadian Tire. Lorna at the North Albert Canadian Tire in Regina not only helped choose my ideal paint colours, she found a variety to help me complete the renovation that I would likely have forgotten I needed. Thanks to that, I was able to move from one job to another whenever I was ready to do so, since I had all the supplies on hand. And the quality of the supplies I received was absolutely fabulous! I don’t know how I painted without a telescopic handle roller before!
If you have a home update you’d like to make, Canadian Tire is here to help! The company is very generously offering one lucky Mommy Kat and Kids reader a Black & Decker Matrix 20V Starter Kit Drill like the one I received and a $50 Canadian Tire gift card to get you started on your own home repairs, a $200 total value! To enter to win, just leave a blog comment about what job you’d like to tackle in your home.

I am so in love with my new living room and even though it took a lot of work, it was worth every minute of it. I now have a fresh, beautiful and modern living room and I’ve learned some valuable new skills that will help me with future home repairs as well. If you have an area in your home that you’d love to update but aren’t sure you can, head to Canadian Tire and find out exactly what tools and skills you’ll need to make it happen. You may just find that getting that stylish look you’ve been craving is easier than you think!
a Rafflecopter giveaway
![]()
I’d love to do our bathroom!
thanks
I would love to sand down and paint my kitchen cupboards
I would love to redo our kitchen! It’s in serious need of an updated makeover!
I would like to finish our bathroom upstairs.
Fabulous work Kat! I cannot believe you did all that work yourself! You are right when you say you’ve learned some very valuable skills. Now, can you teach me how to do some simple renos? Hehe!
Laundry room
I would love to redo my main bathroom!
I’d love to tackle the kitchen.
My laundry room!
We need to finish our back deck and work on the backyard.