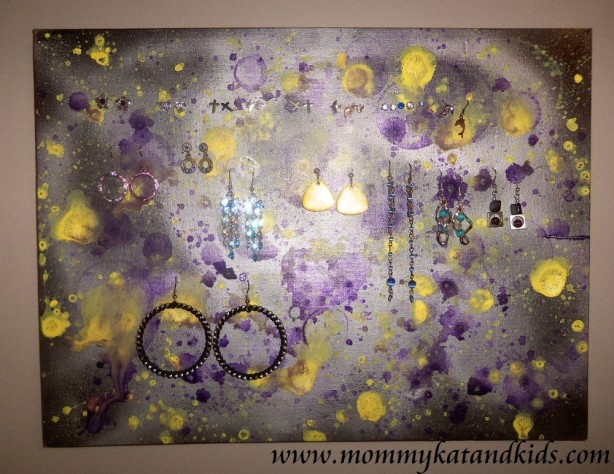
I’m not by nature a very organized person and because of this, a large percentage of the jewellery I buy ends up lost. After losing one earring from my favourite pair I finally decided: this ends today! So I made my own extremely simple DIY earring holder using things I already had in my own house. If you’re less artistic and don’t have these things on you, you may have to go out to buy them but you can get all the supplies for under $5 at the dollar store.
The best part is that you can make it as simple or as extravagant as you like, plus it is super fun to do with kids. The basic materials you’ll need are paint and a cheap dollar store canvas. Size doesn’t matter; it can be as big or small as you like depending on how many earrings you have. I used a 12” x 16” canvas from Dollarama that cost me $2, but it has to be the kind that is stretched over a wood frame (not a panel canvas).

I had some leftover silver and black spray paint from another project but not enough of one colour to paint the whole canvas, so I just sprayed the silver and black on randomly to coat it completely. Don’t forget, it’s your project so you can make the base coat any colour you like using any type of paint and any medium to apply it. (Now I’m thinking about how I should have used a sponge to dab paint for the base!)
After the base coat is dry, it’s time to make it really pop. I chose to use only two colours, purple and yellow. They are complimentary so they always look great together. I mixed a little paint (I use Apple Barrel or DecoArt acrylic paint; a 2-ounce bottle costs less than a dollar at most places and covers a lot more than you’d think), with a dab of dish soap (you might be able to do the bubbles without, but I was making things up as I went along), and a little water in a baby food jar. I put an old bubble wand in each of the two paints and put the canvas on the front lawn. I love painting outside, by the way! No fumes and, for over-spray and spills, no worries; next time the grass gets cut it’ll be gone!
This part is the most fun; blow the paint bubbles at your canvas. If you use enough paint you’ll get big colourful circles. I did not use enough paint so you can see some rings, but I just decided to adjust at this point and splatter the paint instead. If you’re doing this with kids, they can blow bubbles or you can blow bubbles and they can try to catch them on the canvas; super fun!
I let the canvas dry and came back after about 20 minutes with my clear-coat spray (I always have a can of this; it costs about $6 and can be used for TONS of projects), so that hopefully the paint won’t peel off ever. Painting your canvas with a primer before you start helps with this too but both steps are optional. If you want to go above and beyond you can add decorations like glitter, beads, sequins or anything else to help jazz it up even more.

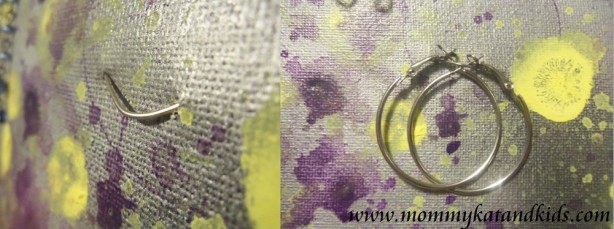
Once the canvas was totally dry, I poked my earrings through and put the backs on so they wouldn’t fall off. Stick two push pins into the wall to hang it and now you’ve got a cute piece of art and a great place to store your earrings. Any time you need a pair just take it off the wall and grab your earrings. Some of my hoops wouldn’t go through (they are full circles), so the next time I was out I grabbed some safety pins to put through the canvas from the back so that I could loop my hoops through the part of the pin on the front.

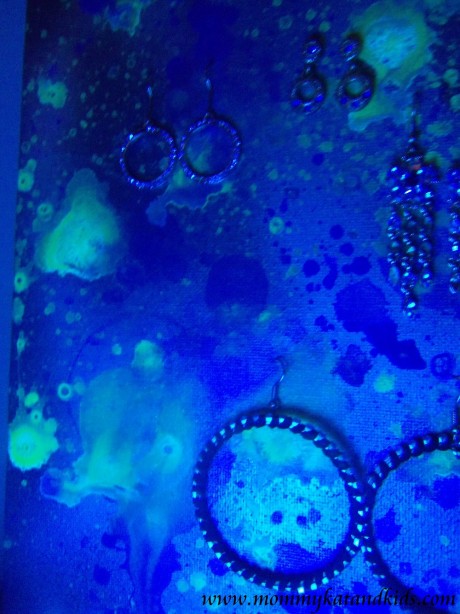
BONUS: I had ordered a product called Tekno Bubbles (if you type it into Google you’ll find tons of places that sell it) online a couple of months ago; it’s a bubble solution that glows under a black light and it works amazingly well. I added a bit to both paints so if you look at this piece of art under a black light, it looks anything but ordinary! If you’re tired of losing your earrings, why not whip up one of these cute earring holders this weekend?

I love this project, but I just CANT get your paint-bubble mixture to work. Im very bummed that all im getting are paint splats…
wait, you own a black light? lol ;)
Ooooh! Looks amazing! Good work! :-)
This is SUPER cute! I’ve been wondering about something like this because I have a drawer for my earrings, but they get all jumbled up in there. I like this – it’s COOL!
Love the Blue one! I am forever misplacing mine!
I really like this idea for keeping earrings all in one place.
That looks awesome Elizabeth. Thanks for sharing :)