
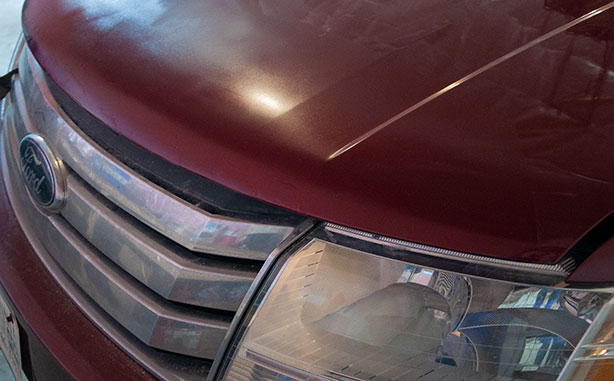
About two years ago, I upgraded my basic car to a sleek and fully loaded Ford Taurus X crossover. It had everything from a built-in DVD player for road trips to Sirius Satellite Radio to an optional third row of seating. And for a 2009 vehicle, it had very low kilometers and was in great shape!
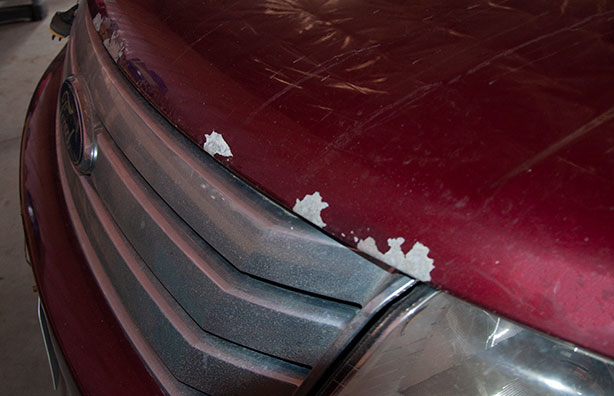
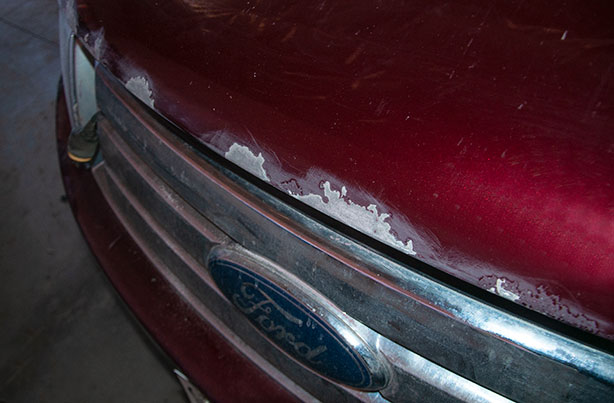
In fact, the only flaw my new vehicle had was a bit of paint chipping on the hood and the wheel wells. I planned to touch them up but wasn’t sure how to do that kind of car body repair and get the smooth results I wanted.
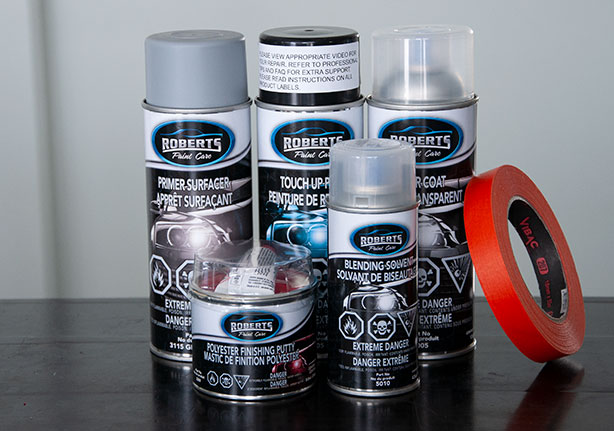
Then, Roberts Paint Care came to my rescue! This Quebec-based company offers automotive paint and repair kits for small touch-up car body repair jobs like the one I wanted to attempt. But, even better, the company also has a variety of step-by-step videos to help DIY fans like me get the best possible results!
Since my paint chips didn’t have any rust, Roberts Paint Care sent me its Touch Up Paint Repair Kit for Deep Scratches, and I couldn’t wait to get started with my repairs. I decided that for my first attempt, I would repair the chips on the front hood. The wheel wells were more damaged, and I wanted to get some practice before attempting that bigger repair.
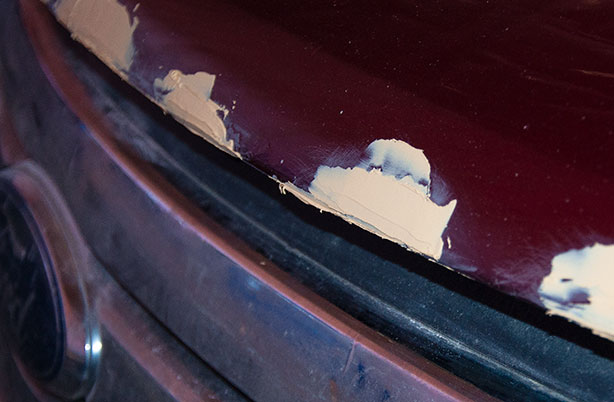
The steps to repair paint chips are relatively simple. After washing and drying the car, I then sanded the edges and surface of the chipped area with 180-grit sandpaper to help the included Polyester Finishing Putty adhere properly. Then I mixed up the required amount of putty and hardener, and used the flexible spreader to smooth it firmly over the chips.
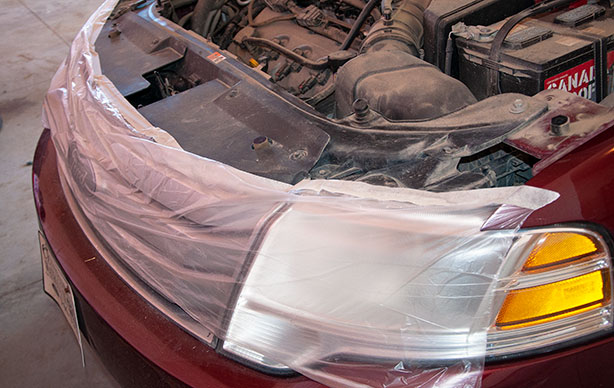
After letting it dry for 15-30 minutes, it was time to sand the area well to smooth out the putty. Since this sanding job was a little more intensive, I taped off the area first to avoid damaging the surrounding areas. The kit included a 2-in-1 masking system and I couldn’t believe how easy it was to protect the area with this all-in-one tape and plastic!
With the area smooth, I was ready to apply primer. I sprayed three coats of Primer Surfacer over the area, waiting 15 minutes between each coat. The primer needed eight hours to cure, so I decided to call it a day and do my final sanding and painting in the morning.
The next day, to prepare the surface for colour once the primer was cured, I sanded the area with fine 400-grit sandpaper. Finally, it was time to apply the paint!
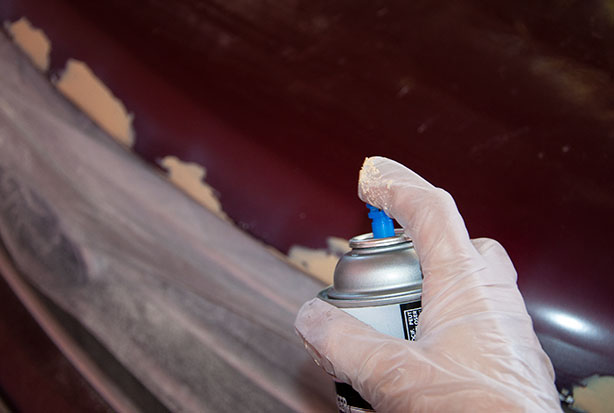
Painting is even more simple than the initial repair and preparation. I started by taping off the area once again. After giving the surface a wipe with a damp cloth and letting it dry thoroughly, I applied three coats of coloured paint and two coats of the clear topcoat, waiting 15 minutes between each.
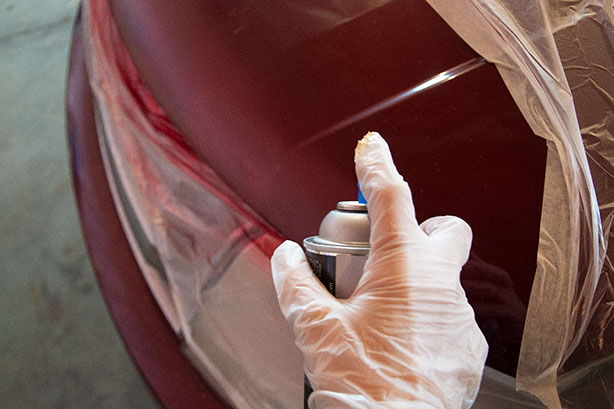
Finally, to ensure the finish was flawless, I sprayed a coat of blending solvent around the edges of my repair job. This helped to blend any excess paint for a seamless finish. I was very impressed by the perfect match of the paint to my original vehicle colour!
What impressed me the most about this kit is that it really was an all-in-one solution for minor car body repairs. So often, I’ve noticed that similar kits are missing a key tool or item, however small, that I then have to scramble to find.
With everything from tape to the putty spreader to the sandpaper included in the Roberts Paint Care Touch Up Kit, I was able to work steadily and thoroughly without missing a step. And I have more than enough paint and materials left for future repairs too!
With the help of a detailed FAQ and quick, informative videos, Roberts Paint Care kits empower ordinary people to save time and money keeping their vehicles in tip-top shape.
With kits to repair scratches, chips, rust spots and even cracked bumpers, you’ll be shocked at how much you can save doing your own minor repairs. And when you see the results, you’ll never want to pay a body shop for a car body repair again!
You did a great job. Wow, I would have never thought to have done this myself… Thank you for the review!
What a big difference! Looks great.
Wow, you did a fantastic job of the repair, well done. This post will be very interesting for many people. I guess nearly every vehicle on the road today has some sort of damage that could do with repairing, so many stones hit my car (and I’m not travel on gravel roads!) that I’m surprised my windscreen isn’t worse than it is.
wow you did a terrific job with your car. My van is in bad shape and I think it’s too far gone. Has lots of rust and rotting and pieces of the body where its bad is falling off. It would need pieces of metal put on the body of it and repaired which would cost way too much that I cannot afford and I can not do it. So I am just looking for another used vehicle for myself. My van is just too old to put any money into it. But this was a great job you did and very educational. Thanks for sharing.
Well done! The end result is fantastic! I will definitely keep these kits in mind if I ever need to make a repair to my truck.
Wow repair great job! It was really informative to read your review on Roberts Paint Care products. I have a few scratches on my car and should look into repairing them too.
You did a great job on repairing all the chips and scratches on your car. I have a number of scratches on my car, especially in the front so this might be a good solution for repairing them.
Looks like it turned out really well! Great to hear your opinions on this product.
Hi Kathryn,hope you are doing well.I love the project,looks simple and got the job done perfect !
The videos are great to have. Your project turned out really well.